Table of Contents
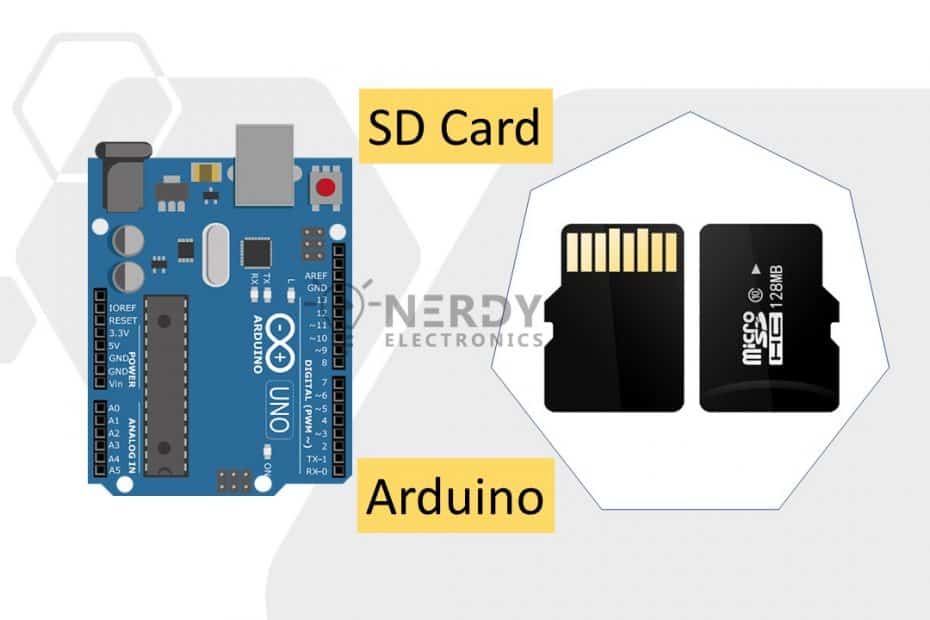
In this post we will see how to use SD card with Arduino. Capturing and storing data is one of the most important parts of every project. There are several ways to store data according to the data type and size. We can store it in the internal EEPROM but that is very limited. We can also send it to a computer or the cloud but that requires extra connectivity. What if we do not have access to these resources? That is where SD cards come into picture.
SD and micro SD cards are one of the most practical ones among the storage devices, which are used in devices such as mobile phones, minicomputers and etc.
In this tutorial, we’ll see
- How to use SD and micro SD cards with Arduino.
- Writing data on SD card
- Reading data from SD card
The SD Card module
The SD card module is very useful for projects that require data logging.
Using the SD library, we create a file in an SD card to write and save data. We can also use the library to read data from any file.
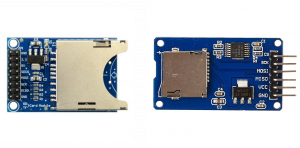
There are different models from different suppliers, but they all work in a similar way, using the SPI communication protocol. Some common SD card modules are shown below.
Pin wiring
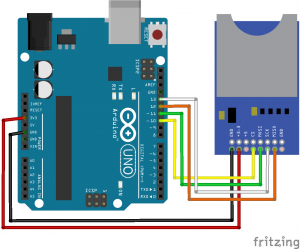
The following table shows how to wire the SD card module to your Arduino
| SD card module | Wiring to Arduino Uno | Wiring to Arduino Mega |
| VCC | 3.3V or 5V (check module’s datasheet) | 3.3V or 5V (check module’s datasheet) |
| CS | 10 | 53 |
| MOSI | 11 | 51 |
| CLK | 13 | 52 |
| MISO | 12 | 50 |
| GND | GND | GND |
Preparing the SD card
The first step when using the SD card module with Arduino is formatting the SD card as FAT16 or FAT32. Follow the instructions below.
1) To format the SD card, insert it in your computer. Go to My Computer and right click on the SD card. Select Format
2) A new window pops up. Select FAT32, press Start to initialize the formatting process and follow the onscreen instructions.
SD card module Circuit
Insert the formatted SD card in the SD card module.
Connect the SD card module to the Arduino as shown in the circuit schematics below or check Pin Wiring from the previous section.
Testing the SD card module
To use these modules with Arduino you need the SD library. This library is installed on the Arduino application by default.
NoteThese modules can not handle high-capacity memory cards. Usually, the maximum identifiable capacity of these modules is 2GB for SD cards, and 16GB for micro SD cards.
Code – CardInfo
To make sure everything is wired correctly and the SD card is working properly, in the Arduino IDE window go to File> Examples > SD > CardInfo.
Upload the code to your Arduino board. Make sure you have the right board and COM port selected.
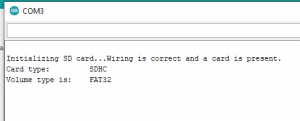
Open the Serial Monitor at a baud rate of 9600 and you should see your SD card information.
If everything is working properly you’ll see a similar message on the serial monitor.
Important SD Module Library Commands
| Description | Command |
| Initializes the SD library and card. Enter the Arduino pin connected to the SS pin as a function’s argument. | SD.begin(#sspin) |
| Tests whether a file or directory exists on the SD card. | SD.exists(filename) |
| Opens a file on the SD card in reading or writing mode. (If you leave the mode section blank, the file will open in reading mode by default) If the file is opened for writing. it will be created a file with this name if it doesn’t already exist. | SD.open(filepath, mode) |
| Close the file and ensure that any data written to it is physically saved to the SD card. | file.close()* |
| Remove a file from the SD card. | SD.remove(filename) |
| Create a directory on the SD card | SD.mkdir(filename) |
| Remove a directory from the SD card. | SD.rmdir(filename |
| Returns the file name | file.name()* |
| Print data to the file | file.print(data) |
| Print data, followed by a carriage return and newline | file.println(data |
| Read from the file. | file.read() |
| Check if there are any bytes available for reading from the file. | file.available() |
*file is an instance from File class.
Read and write to the SD card
The SD library provides useful functions for easily write in and read from the SD card.
To write and read from the SD card, we first need to include the SPI and SD libraries:
#include <SPI.h>
#include <SD.h>
We now to initialize the SD card module at the Chip Select (CS) pin – in our case, pin 10.
SD.begin(10);To open a new file in the SD card, you need to create a file object that refers to your data file. For example:
dataFile = SD.open("data.txt", FILE_WRITE);The first parameter of this function is the name of the file, data.txt, and the FILE_WRITE ;argument enables us to write into the file.
This line of code creates a file called data.txt on your SD card. If the data.txt file already exists, Arduino will open the file instead of creating another one.
We have also created an object called “dataFile“, which now refers to our “data.txt” file. We will now use the “dataFile” for our operations.
To write data to the currently open file, you use:
dataFile.write(data);dataFile is the file object we created earlier and the data is what we want to write in the file.
You can also use the print() or println() functions to print data into the file:
dataFile.print(data);
dataFile.println(data); // followed by a new line
To read the data saved on your file:
dataFile.read();We can only use one file at a time, so you need to close a file before proceeding to the next one. To close the data.txt file we’ve just created:
dataFile.close();The argument of this function is the file you want to close, in this case data.txt.
For a complete sketch on how to read and write, in your Arduino IDE go to File> Examples > SD > ReadWrite.
Writing data on SD card with Arduino:
#include <SPI.h>
#include <SD.h>

File dataFile;

void setup()
{
    // Open serial communications and wait for port to open:
    Serial.begin(9600);
    while (!Serial); // wait for serial port to connect. Needed for native USB port only

    Serial.print("Initializing SD card...");
    if (!SD.begin(10))
    {
        Serial.println("initialization failed!");
        while (1);
    }
    Serial.println("initialization done.");
    // open the file. note that only one file can be open at a time,
    // so you have to close this one before opening another.

    dataFile = SD.open("data.txt", FILE_WRITE);

    // if the file opened okay, write to it:
    if (dataFile)
    {
        Serial.print("Writing to data.txt...");
        dataFile.println("This is a data file :)");
        dataFile.println("testing 1, 2, 3.");
        for (int i = 0; i < 20; i++)
        {
            dataFile.println(i);
        }
        // close the file:
        dataFile.close();
        Serial.println("done.");
    }
    else
    {
        // if the file didn't open, print an error:
        Serial.println("error opening data.txt");
    }
}
void loop()
{
// nothing happens after setup
}
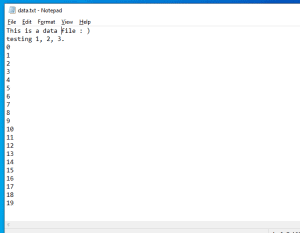
Let us what is written into the file. We take the SD card and put it in the computer or laptop and open the file. Following in the file contents.
Reading data from SD card with Arduino
Once we have written to the SD card, let’s try to read it.
#include <SPI.h>
#include <SD.h>

File dataFile;

void setup()
{
    // Open serial communications and wait for port to open:
    Serial.begin(9600);
    while (!Serial); // wait for serial port to connect. Needed for native USB port only

    Serial.print("Initializing SD card...");
    if (!SD.begin(10))
    {
        Serial.println("initialization failed!");
        while (1);
    }
    Serial.println("initialization done.");
    // open the file for reading:

    dataFile = SD.open("data.txt");

    if (dataFile)
    {
        Serial.println("data.txt:");
        // read from the file until there's nothing else in it:
        while (dataFile.available())
        {
            Serial.write(dataFile.read());
        }
    // close the file:
    dataFile.close();
    }
    else
    {
        // if the file didn't open, print an error:
        Serial.println("error opening data.txt");
    }
}

void loop()
{
// nothing happens after setup
}
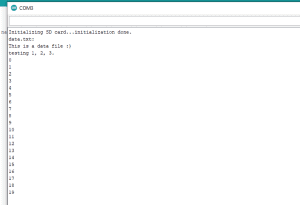
Following is the output received in the Serial Monitor after reading the file.
This is how we use an SD card with an Arduino.
Now, we can use it in some projects, such as the Temperature Logger with Arduino. In this project, we read the temperature every 15 minutes and store it in the SD card with a time stamp. We read the time stamp using an RTC or a Real Time Clock.
Hi, I’m Vivek, a Senior Embedded Innovation Specialist. I have been working on Embedded Systems and IoT for the past 11 years. I love to share my knowledge and train those who are interested. Nerdyelectronics.com was started out of this interest. You can read my full profile in this link.


pls suggest or supply the following
we have microcontroller based on sd card these date compactable with thermal printer for printing